Nextcloud Howto Debian 9
Nextcloud Installation unter Debian Stretch mit php-fpm und MariaDB.
Server Vorbereitung
Als erstes sollte ein Server oder einer VM mit genügend Speicherplatz zur Verfügung stehen. 2 CPUs und 2 GB Ram sollten Mindestens vorhanden sein.
PHP Installation
Die benötigten PHP Pakete installieren.
apt-get install php-fpm php-gd php-json php-mysql php-curl php-intl php-mcrypt php-imagick php-zip php-xml php-mbstring php-apcu php-redis php-ldap php-pearDie PHP Config für den FPM anpassen. Man kann das entweder in der php.ini machen, oder über das conf.d Verzeichnis.
/etc/php/7.0/fpm/conf.d/90-nextcloud.iniopcache.enable=1
opcache.enable_cli=1
opcache.interned_strings_buffer=8
opcache.max_accelerated_files=10000
opcache.memory_consumption=128
opcache.save_comments=1
opcache.revalidate_freq=1
upload_max_filesize=1G
post_max_size=1G
memory_limit=512M
mbstring.func_overload=0
always_populate_raw_post_data=-1
default_charset='UTF-8'
output_buffering=0
php-fpm muss dann noch neu gestartet werden.
service php*-fpm restartWebserver Installation
Den Apache2 Webserver installieren
apt-get install apache2

a2enmod proxy_fcgi setenvif rewrite headers
a2enconf php7.0-fpm

systemctl restart apache2
Datenbank Server Installation
Hier kann entweder eine mySQL oder eine MariaDB installiert werden. Da es ab Debian 9 nur noch MariaDB geben wird, nehmen wir diese.
apt-get install mariadb-serverMySQL root Passwort setzen
Es ist auf jeden Fall sinnvoll ein Root Passwort zu setzen.
Schade ist das das früher bei mySQL automatisch bei der Installation abgefragt wurde .
mysql -D mysql -e "update user set password=PASSWORD('NEUES_PASSWORT') where User='root'; update user set plugin='' where User='root'; flush privileges"Alternativ kann man auch das Programm mysql_secure_installation verwenden, und die ganzen fragen beantworten.
MySQL Root my.cnf anlegen (Optional)
Wenn man nicht immer das Root Passwort eingeben will kann man das hier in dem File hinterlegen.
nano /root/.my.cnf[client]
user=root
password=NEUES_PASSWORT
Redis Server Installieren
Der Redis wird für das Caching benötigt
apt-get install redis-serverBenötigte Packte für die Dokumentenbearbeitung (Optional)
apt-get install libreoffice-math libreoffice-writer libreoffice-sdbc-hsqldb libreoffice-report-builder-bin libreoffice-impress libreoffice-draw libreoffice-calc libreoffice-base libreoffice-base-drivers libreoffice-base-core libreoffice-avmedia-backend-gstreamer libreoffice-coreNextcloud Installation und Konfiguration
Für die Nextcloud wird eine Datenbank und ein User benötigt.
Nextcloud DB und User anlegen
mysql -D mysql -e "create database nextcloud; grant usage on *.* to nextcloud@localhost identified by 'NEXTCLOUD_PASSWORT'; grant all privileges on nextcloud.* to nextcloud@localhost; flush privileges"Nextcloud runter laden
Die Releases von Nextcloud findet man hier.
cd /var/www/
wget https://download.nextcloud.com/server/releases/latest.zip

unzip latest.zip
Berechtigungen Setzen
Da ich die Nextcloud allein auf dem Server betreibe gebe ich Ihr den Webserver User
chown www-data:www-data /var/www/nextcloud -RApache Konfiguration erstellen
nano /etc/apache2/sites-available/nextcloud.conf<VirtualHost *:80>
ServerName nextcloud.example.de
ServerAlias nextcloud.example.com
ServerAdmin webmaster@localhost
DocumentRoot /var/www/nextcloud
<Directory /var/www/nextcloud/>
Options Includes FollowSymLinks MultiViews
AllowOverride All
<IfModule mod_dav.c>
Dav off
</IfModule>
SetEnv HOME /var/www/nextcloud
SetEnv HTTP_HOME /var/www/nextcloud
</Directory>
Header always set Strict-Transport-Security "max-age=15768000; includeSubDomains; preload"
Header always set Referrer-Policy "no-referrer"
# Available loglevels: trace8, ..., trace1, debug, info, notice, warn,
# error, crit, alert, emerg.
# It is also possible to configure the loglevel for particular
# modules, e.g.
#LogLevel info ssl:warn
ErrorLog ${APACHE_LOG_DIR}/error.log
CustomLog ${APACHE_LOG_DIR}/access.log combined
</VirtualHost>Apache vhost Config laden und den default vhost entfernen
a2dissite 000-default
a2ensite nextcloud

systemctl reload apache2
Jetzt kann man die Installation im Browser begingen
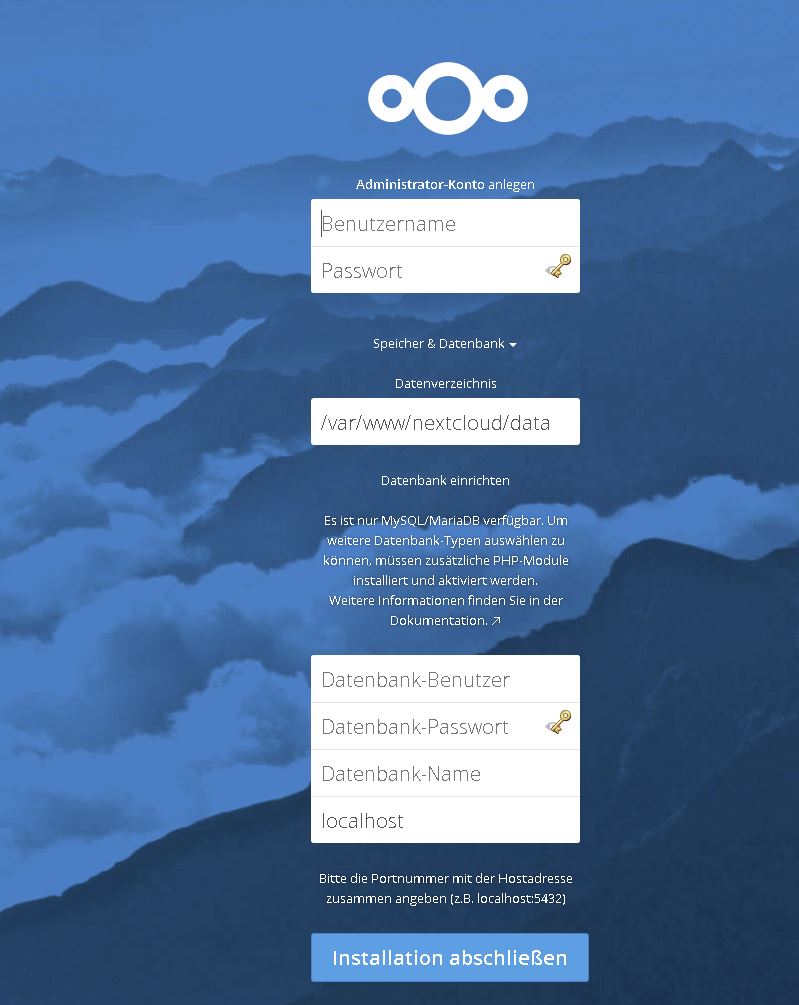
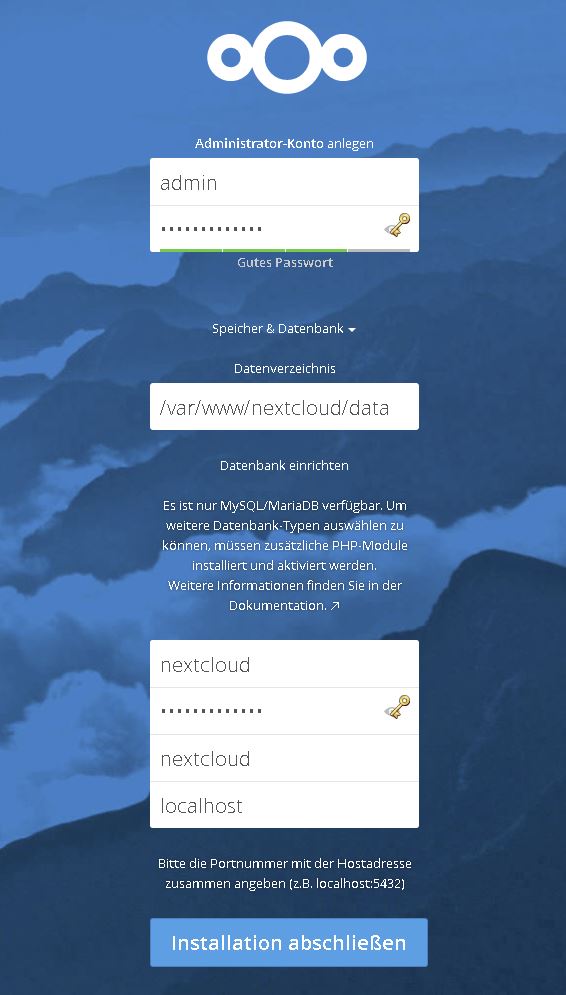
Hier die Zugangsdaten eingeben und die Installation abschließen.
Crontab einrichten
crontab -u www-data -e*/15 * * * * php -f /var/www/nextcloud/cron.phpIn der Nextcloud, im Admin Interface muss man dann noch die Hintergrundaufgaben auf Cron umstellen
Caching Backend aktivieren
Um die Nextcloud noch etwas schneller zu machen aktivieren wir jetzt noch das Caching mittels Redis
nano /var/www/nextcloud/config/config.phpIn den Config Array einfügen
  'memcache.local' => '\\OC\\Memcache\\Redis',
  'redis' =>
  array (
    'host' => 'localhost',
    'port' => 6379,
  ),
  'memcache.locking' => '\\OC\\Memcache\\Redis',  // Add this for best performance
Danke für diese Anleitung, Nextcloud funktioniert damit.
I bekomme die security Warnung …“The .htaccess file is not working“… und weis nicht mehr weiter.
Nach meinen Verständnis handelt es sich darum: Nextcloud comes with its own nextcloud/.htaccess file. Because php-fpm can’t read PHP settings in .htaccess these settings and permissions must be set in the nextcloud/.user.ini file.
Aber auch wenn ich den gesamten Inhalt von nextcloud/.htaccess in nextcloud/.user.ini kopiere passiert nichts.
Könnten Sie mir weiterhelfen.
Hi,
die .htaccess wird vom Apache ausgelesen und verwendet.
In der vhost config muss die Zeile AllowOverride All vorhanden sein.
Und das Apache module rewrite geladen sein. a2enmod rewrite
Danach noch den Apache neu starten.
Danke,
ich habe dein Tutorial für meine Test Installation schritt für schritt befolgt. Also ist AllowOverride All vorhanden. Dennoch bekomme ich die Fehlermeldung.
Die installations Anleitung besagt „Nextcloud comes with its own nextcloud/.htaccess file. Because php-fpm can’t read PHP settings in .htaccess these settings and permissions must be set in the nextcloud/.user.ini file.“
Wenn ich in Nextcloud über Https einlogge habe ich keine Fehlermeldung.
Mittlerweile habe ich eine neu Installation vorgenommen und das Data Verzeichnis außerhalb Angelegt. Dann kommt auch keine Fehler Meldung.
Für was wird die .htaccess datei gebraucht?
lg Kocj
in der .htaccess Datei werden die Zugriffe auf die Verzeichnisse geregelt und rewrite Regeln gesetzt.
Super Tutorial, danke!
I was just looking for this info for a while. After 6 hours of continuous Googleing, finally I got it in your web site. I wonder what’s the lack of Google strategy that do not rank this type of informative websites in top of the list. Generally the top web sites are full of garbage.